Getting started
Find your way around Oscivara
Oscivara has several workspaces. Each offers a different view of your music, from an individual sound or note to a complete arrangement.
Choose a workspace from the top bar
| Workspace | Open it when you want to… |
|---|---|
| Library | Create or open a project, find saved material and explore community work. |
| Studio | Arrange clips in time, combine tracks and listen to the whole composition. |
| MIDI | Write a melody or edit notes, rhythm, instruments and expression. |
| Samples | Work on an individual sound and its shape or character. |
| Instruments | Set up a playable sound for a musical part. |
| EQ | Adjust the project's frequency balance and master processing. |
Changing workspace does not mean you have created a new project. Check the current project name. To start a separate composition, create a new project in Library.
Read the Studio screen
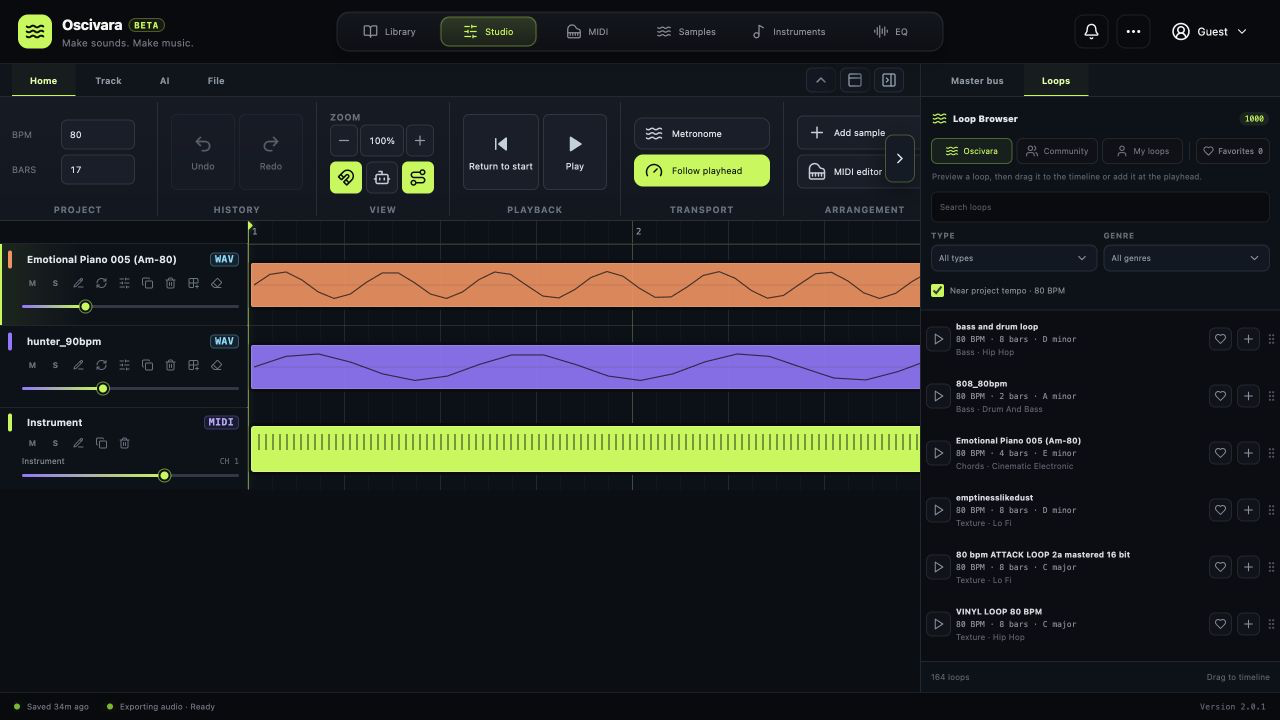 Commands sit above the arrangement. Track controls and additional panels sit on either side.
The ribbon at the top contains tabs with commands for the current workspace. Each track has its name and sound controls on the left. The timeline in the centre shows musical material placed along a time ruler. A library or settings panel appears on the right, depending on the current view.
A track is a horizontal lane for a part. A clip is a particular piece of material on that lane. You can adjust one clip without changing the others, or adjust the volume of an entire track.
Make room for your work
- Collapse the ribbon using its arrow button when you need more vertical space. Its tabs remain available.
- Hide the side panel when you want a wider view of the arrangement. Its control is near the edge of the ribbon.
- Change the timeline zoom, rather than the browser page zoom, to see more bars.
- Hover over an unfamiliar button to read its tooltip. Tooltips can be enabled in the ⋯ menu.
On a small screen, some ribbon commands may sit beyond a horizontal scroll area. Check the selected tab and scroll position before assuming a command is missing.
Find help and task status
The ⋯ menu includes Wiki, keyboard shortcuts, bank management, performance diagnostics and information about the application. Wiki opens separately, so you can keep the instructions beside Studio.
The SteppeMind window contains the conversation and AI task history. Stem separation creates its own task. Notifications also report completed operations and errors. The bottom status bar helps you check saving and export.
Next: arrange your music or choose between Composer and Maestro.