Mixing & export
Mix analysis: spectrum, spectrogram and stereo
The analysis panel shows frequency balance, levels and mono compatibility during playback. Use these measurements alongside listening to locate problems and check changes to your mix.
Open analysis and start measuring
- Open Studio → Master bus → Mix analysis. The audio and MIDI track mixers also have this button; opening it there selects that track as the analysis source.
- If the panel offers Enable live mixing, stop the transport and press the button. Live mixing is also available in the master sidebar and is saved with the project.
- Start arrangement playback. The panel receives no measurement signal while the music is stopped.
- Choose Signal source and View. Hover over controls to read their explanations.
Choose a signal source
Master measures the final output after master processing. When mono monitoring is enabled, master measurements reflect the mono signal.
An individual track is measured after its processing, gain, pan and mute, before groups, sends and the master bus. This lets you inspect a channel even with the master level turned down. Choosing a source does not enable Solo or change which tracks you hear.
Switch views
| View | What it shows | Useful for |
|---|---|---|
| Spectrum | Frequencies from left to right, with level on the vertical axis | Finding excessive bass or a narrow harsh frequency region |
| Spectrogram | Frequencies vertically and the last 12 seconds of playback horizontally; brighter means louder | Seeing when a whistle, low rumble or bright transient appears |
| Stereo image | The relationship between the left and right channels | Inspecting width and unusual channel differences |
The spectrogram shows recent live audio. It is not an overview of the entire file and cannot erase or edit individual frequencies.
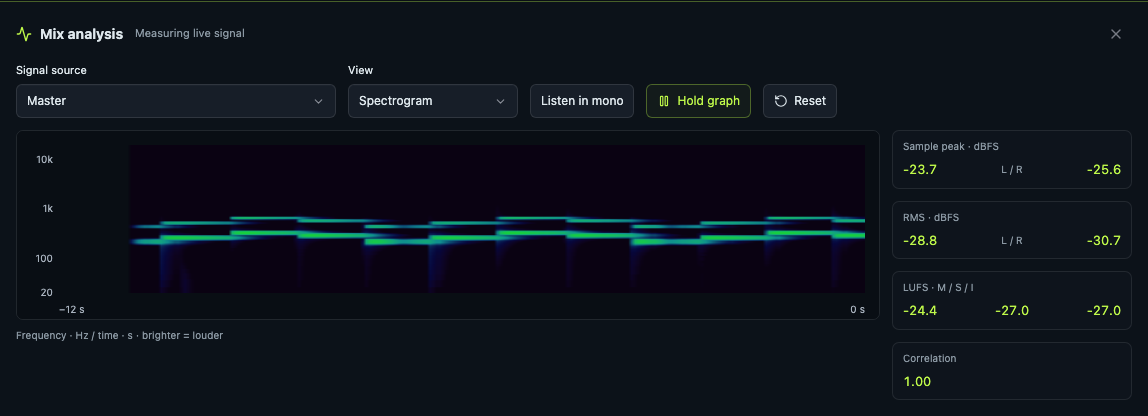 Mix analysis → View → Spectrogram. Hold graph is enabled for this capture; meters show measured practice audio, not mix targets.
Read the meters
| Meter | How to use it |
|---|---|
| Sample peak · dBFS | Maximum L/R sample values. The clipping indicator helps identify the digital limit and remains lit until reset |
| RMS · dBFS | Average channel energy, useful for comparing signal density |
| LUFS M | Momentary loudness over 400 ms |
| LUFS S | Loudness over 3 seconds; a value appears after that interval has accumulated |
| LUFS I | Integrated loudness since the current measurement began, not automatically the entire project |
| Correlation | Values closer to +1 indicate more similar channels; negative values call for a mono listening check |
A dash means there is insufficient data or the measurement does not apply to the current signal. For example, correlation is undefined during silence. Sample peak is not true-peak: the master true-peak limiter serves a different purpose.
To assess LUFS I for a whole composition, reset analysis and play from beginning to end without changing the source. Loops and repeated sections also contribute to the accumulated measurement.
Check mono compatibility
During playback, press Listen in mono and compare bass, vocals and wide effects. If an important part becomes much quieter or disappears, review its pan, stereo width and processing.
This button folds the entire monitoring output to mono, even when an individual track is selected for analysis. It does not change project settings or the exported WAV. Pressing it again, closing analysis, stopping the transport or switching workspace restores stereo.
Hold, reset and recovery
Hold graph freezes the drawing while numeric meters continue updating. Use it to examine a spectrum without stopping the music.
Reset starts measurements and history again. Changing the source, reopening the panel and returning from the background also start a new measurement. Analysis pauses in a hidden tab; the spectrogram does not join the gap to old history when you return.
If analysis is unavailable, press Reset to retry. Check live mixing, playback, mute and the selected source's levels. An analyzer error on its own should not stop the music.
Continue with balance and effects and check your exported WAV.